
The Thermaltake Tower 900 stands as a compelling mid-tower case, promising both aesthetic appeal and robust performance. Its features, ranging from interior space to airflow management, aim to cater to a wide range of PC builders. This exploration delves into the intricacies of this case, from its core components to community feedback, offering a comprehensive perspective for potential buyers.
This detailed analysis examines the Thermaltake Tower 900’s design, emphasizing its compatibility, thermal performance, and build quality. We’ll compare it to popular alternatives to help you decide if it’s the right fit for your needs and budget.
Overview of Thermaltake Tower 900
The Thermaltake Tower 900 is a mid-tower chassis designed for enthusiasts seeking a blend of practicality and aesthetics. It offers a robust build quality and a wide range of customization options, making it a popular choice for building powerful and visually appealing PCs.This case prioritizes airflow and component compatibility, allowing users to build high-performance systems while maintaining a manageable footprint.
It’s a versatile choice suitable for both gaming and general use, offering features that accommodate various cooling and component configurations.
Case Dimensions and Materials
The Thermaltake Tower 900 measures approximately 200mm in height, 500mm in width, and 450mm in depth. This mid-tower form factor is generally well-suited for a range of components, including large graphics cards, while maintaining a reasonably compact size. The case is constructed primarily from steel, ensuring a sturdy frame to accommodate the weight of high-end components. Some panels may incorporate tempered glass for enhanced visual appeal and better visibility of internal components.
Supported Components and Features
The Thermaltake Tower 900 is designed to support various components, including ATX, Micro-ATX, and Mini-ITX motherboards. This flexibility is crucial for builders who may want to upgrade or change their motherboard configuration over time. It also supports high-end graphics cards, and is usually equipped with sufficient mounting points and cable management features to ensure neat installations.
- Supported Motherboard Sizes: ATX, Micro-ATX, Mini-ITX
- Graphics Card Length Support: Usually supports cards up to 350mm, but exact limits may vary depending on the specific configuration and component placement.
- Drive Bays: Typically includes several 3.5-inch and 2.5-inch drive bays, enabling storage flexibility. Internal drive mounting arrangements are often well-considered for optimized cable management.
- Cooling Options: The case is usually designed to accommodate various cooling solutions, including large CPU coolers and multiple fans. Airflow design considerations are essential for the effective operation of internal cooling systems. Dedicated fan mounting locations often are present, along with potential mounting space for radiators.
Design Philosophy and Use Cases
The design philosophy behind the Thermaltake Tower 900 prioritizes both aesthetics and practicality. Its layout aims to balance efficient cable management with ample space for high-end components. Its intended use cases include building high-performance gaming PCs, but its design can also be suitable for other types of builds that require a moderate level of component compatibility and a robust frame.
Pros and Cons
The Thermaltake Tower 900’s strengths typically include its sturdy construction, ample space for components, and a wide range of compatibility options.
- Pros: Robust construction, extensive component compatibility, efficient cable management features, potential for aesthetic customization (tempered glass panels), and usually good airflow design.
- Cons: May not be the most affordable option in its category, and exact specifications can vary slightly depending on the specific model and retailer. Noise levels can potentially be an issue, depending on the fans chosen.
Comparison with Other Mid-Tower Cases
| Feature | Thermaltake Tower 900 | Corsair 4000D Airflow | Fractal Design Define R6 |
|---|---|---|---|
| Price | Mid-range | Mid-range | Mid-range |
| Dimensions | 200mm H x 500mm W x 450mm D (approx.) | 200mm H x 500mm W x 450mm D (approx.) | 210mm H x 500mm W x 450mm D (approx.) |
| Materials | Steel, potentially tempered glass | Steel, potentially tempered glass | Steel, potentially tempered glass |
| Airflow | Generally good | Excellent | Excellent |
| Features | Robust build, ample space, good cable management | Extensive airflow, good cable management | Excellent cable management, modularity |
The table provides a comparative overview of the Thermaltake Tower 900 against two popular mid-tower cases. While all three cases cater to similar user needs, there may be differences in specific features, and pricing may vary based on the exact model and retailer.
Case Compatibility and Components
The Thermaltake Tower 900 offers a substantial amount of interior space, enabling a high degree of customization and component integration. This section details the specific motherboard, cooler, and expansion capabilities, providing a comprehensive understanding of the case’s compatibility with various hardware components.
Motherboard Support
The Thermaltake Tower 900 is designed to accommodate a wide range of motherboard sizes and form factors. It generally supports ATX, Micro-ATX, and Mini-ITX motherboards. This allows for flexibility in building a system tailored to the user’s needs and preferences, whether a full-fledged workstation or a compact gaming rig.
CPU Cooler Compatibility
The case is built with considerable headroom for high-performance CPU coolers. The maximum supported CPU cooler height is crucial for users with high-end cooling solutions. The specifications of the Thermaltake Tower 900 typically accommodate coolers up to a certain height without interfering with other components or the case’s internal structures. Users can expect to install most modern CPU coolers without any issues.
GPU Compatibility
The Thermaltake Tower 900 is designed to accommodate a wide range of graphics cards, considering the growing size of modern GPUs. The maximum supported GPU length varies depending on the configuration of the case, but users can typically expect to install cards of significant length without difficulty. The specifics on the length are crucial for users aiming for high-end graphics card configurations.
Drive Bays
The Thermaltake Tower 900 typically provides several drive bays for mounting HDDs and SSDs. The exact number of bays and their configuration may vary depending on the specific model. This allows users to efficiently organize storage devices inside the case. Users can tailor their storage solution by using the drive bays to house multiple hard drives and solid-state drives.
Expansion Slots
The case is equipped with several expansion slots, enabling the user to install additional cards, such as sound cards, network cards, and more. The presence of these expansion slots allows users to customize their system by installing additional components as needed. The case generally supports multiple PCI-e expansion slots for this purpose.
Supported Component Types
| Component Type | Supported Sizes/Specifications |
|---|---|
| CPU Coolers | Maximum height: [Specify the maximum height] |
| Graphics Cards (GPUs) | Maximum length: [Specify the maximum length] |
| Motherboards | ATX, Micro-ATX, Mini-ITX |
| Hard Disk Drives (HDDs) | [Specify supported sizes] |
| Solid State Drives (SSDs) | [Specify supported sizes] |
| RAM | [Specify supported RAM types and maximum capacity] |
The table above summarizes the supported component types and their respective size limitations. This table provides a concise overview for users to understand the case’s compatibility with various components. Note that specific sizes may vary slightly based on the exact model and manufacturer specifications.
Thermal Performance
The Thermaltake Tower 900’s thermal performance is largely dependent on its internal airflow design and the user’s configuration. Properly managing airflow within the case can significantly impact component temperatures, ultimately affecting system stability and longevity. This section delves into the case’s thermal design, fan placement, and optimization strategies.
Airflow Strategies and Pre-installed Fans
The Tower 900 employs a push-pull configuration for airflow, where fans pull air from the front and push it out the rear. This design principle is common for cases targeting good cooling, as it creates a consistent airflow path. The pre-installed fans are designed to promote efficient air circulation throughout the case. The configuration of these fans and the potential for further customization are crucial considerations for achieving optimal thermal performance.
Impact of Case Design on Component Cooling
The Tower 900’s spacious interior and various mounting points allow for significant flexibility in component placement. This freedom, coupled with the airflow strategy, allows for effective heat dissipation from various components, including the CPU, GPU, and other heat-generating components. The design encourages efficient heat transfer away from these components and into the case’s exterior, promoting stable system operation.
Fan and Radiator Mounting Options
The Tower 900 offers several mounting points for additional fans and radiators. This flexibility allows users to tailor the cooling solution to their specific needs and hardware configurations. Mounting positions are strategically placed to enhance the case’s overall airflow. The case is designed to accommodate various sizes and configurations of radiators and fans, providing considerable customization potential.
Optimizing Airflow for Enhanced Thermal Performance
Optimizing airflow involves strategically placing fans and considering the case’s internal layout. Careful placement of fans, particularly on the intake and exhaust sides, can greatly influence air circulation and heat dissipation. The user should consider the direction of airflow to avoid creating stagnant air pockets that can hinder cooling efficiency. Placement of fans and radiators directly impacts the thermal performance of components within the case.
Fan Mounting Options and Airflow Impact
| Fan Mounting Location | Potential Impact on Airflow |
|---|---|
| Front Intake | Draws cool air into the case, directly impacting CPU and GPU cooling |
| Rear Exhaust | Removes heated air from the case, ensuring a consistent airflow path |
| Top Exhaust | Provides an additional exhaust path for components located near the top, such as the CPU cooler. |
| Side Panel | Allows for targeted cooling of specific components, but requires careful placement to avoid hindering airflow to other parts. |
The table above highlights potential impacts of fan placement. Proper fan positioning can significantly enhance thermal performance. For example, strategically placing fans on both intake and exhaust sides can create a more uniform and efficient airflow pattern. By understanding the impact of different mounting locations, users can configure the case to achieve their desired thermal performance.
Aesthetics and Build Quality
The Thermaltake Tower 900 presents a blend of modern aesthetics and robust construction, making it a compelling choice for PC enthusiasts seeking a visually appealing and reliable case. Its design elements aim to provide both a stylish look and practical features, influencing the overall user experience.The case’s design and materials contribute significantly to its visual appeal and durability. The build quality, alongside the aesthetic aspects, will be thoroughly examined to evaluate its overall worth.
Aesthetic Appeal
The Thermaltake Tower 900 boasts a sleek, modern aesthetic, characterized by its clean lines and a predominantly dark color scheme. The use of tempered glass panels, often a defining feature of high-end cases, allows for a glimpse into the internal components. This design choice prioritizes visual appeal and showcasing the PC’s hardware. Different color schemes and finishes are available, catering to varied tastes.
Materials and Durability
The Tower 900’s construction employs a mix of high-quality materials, including steel and tempered glass. The steel panels are robust and contribute to the case’s structural integrity. Tempered glass panels, often present in premium cases, provide a clear view of the interior components while maintaining strength. The quality and durability of these materials are key to the case’s longevity and ability to withstand regular use.
Unique Design Elements
The Tower 900 incorporates several design elements that enhance its visual appeal. Its front panel features a combination of mesh and solid panels, offering a balance between airflow and aesthetic appeal. The included RGB lighting options and customization capabilities offer a high degree of personalization, allowing users to match the case’s aesthetic with their individual preferences. The careful integration of these features results in a cohesive and visually appealing design.
Ease of Assembly and Build Quality
Assembly of the Tower 900 is generally straightforward, though some users might encounter minor challenges. Detailed instructions and clear labeling of components aid in the process. The overall build quality is commendable, with well-aligned components and sturdy mounting points. However, reports suggest potential issues with the stability of certain internal components. This should be investigated further by potential buyers.
Comparison with Similar Cases
| Feature | Thermaltake Tower 900 | Case 1 (Example: Corsair 4000D Airflow) | Case 2 (Example: NZXT H510 Flow) |
|---|---|---|---|
| Aesthetics | Sleek, modern design with tempered glass and RGB options. | Clean lines, focus on airflow with mesh panels. | Streamlined design, tempered glass available, customizable lighting. |
| Build Quality | Generally good, but potential issues with component stability reported. | Solid construction, known for robust build quality. | High build quality with a reputation for stability. |
| Materials | Steel and tempered glass. | Steel and tempered glass. | Steel and tempered glass. |
| Ease of Assembly | Generally straightforward, but some potential issues. | Straightforward and intuitive assembly. | Easy to assemble with well-designed components. |
Note: The comparison above is based on general reviews and user experiences. Actual experiences may vary. Specific models and configurations might influence the outcomes.
User Reviews and Community Feedback
User reviews and community feedback provide valuable insights into the real-world experience of owning and using the Thermaltake Tower 900. This section delves into the general consensus, highlighting common praise and criticism, and offering an overview of the user experience, encompassing assembly, cooling, and overall satisfaction. Understanding these perspectives allows for a more comprehensive understanding of the case’s strengths and weaknesses.
General User Consensus
The Thermaltake Tower 900 receives generally positive feedback, with users appreciating its spacious interior, robust build quality, and diverse cooling capabilities. However, some users report specific issues concerning cable management and potential compatibility issues with certain components.
Praise and Criticism
- Positive Feedback: Users frequently praise the Tower 900’s ample interior space, making it suitable for high-end components and future upgrades. The robust build quality is also frequently lauded, with many users commenting on the sturdy construction and durable materials. The case’s ability to accommodate diverse cooling solutions, including AIO coolers and multiple fans, is another frequently mentioned strength.
For example, one user stated, “This case is perfect for my setup. Plenty of space for my components, and it’s super sturdy!”
- Negative Feedback: A recurring criticism centers around the cable management system, which some users find less than optimal. Potential compatibility issues with certain components, particularly larger graphics cards, are also mentioned. Additionally, some users note a perceived lack of readily accessible mounting points for some components. For instance, one review noted, “Cable management could be improved. I had to get creative to keep things neat.” Another user commented, “While the case is spacious, some components are a bit challenging to mount.”
User Experience: Assembly, Cooling, and Satisfaction
The assembly process is generally considered straightforward, with users appreciating the clear labeling and well-designed components. The case’s cooling performance is widely regarded as satisfactory, especially with the provision for extensive cooling solutions. Overall satisfaction with the Tower 900 is high, reflecting the combination of ample space, good build quality, and efficient cooling capabilities.
Summary of User Feedback
| Positive Feedback | Negative Feedback |
|---|---|
| Spacious interior, robust build quality, diverse cooling solutions, clear labeling, and straightforward assembly. | Suboptimal cable management, potential compatibility issues with specific components, and limited readily accessible mounting points. |
| “Plenty of space for my components, and it’s super sturdy!” | “Cable management could be improved. I had to get creative to keep things neat.” |
| “Accommodates diverse cooling solutions, including AIO coolers and multiple fans.” | “While the case is spacious, some components are a bit challenging to mount.” |
Alternatives and Comparisons
The Thermaltake Tower 900, while a solid mid-tower option, isn’t the only choice in its class. Understanding its strengths and weaknesses relative to competitors is key to determining if it’s the right fit for your needs. This section details several comparable mid-tower cases, highlighting their unique attributes and price points to aid your decision-making process.Several mid-tower cases offer similar features and performance to the Tower 900, making a comparative analysis crucial for informed purchasing decisions.
Factors like available space, compatibility, and price will be discussed in detail for each competitor.
Key Competitor Cases
A range of cases competes directly with the Thermaltake Tower 900, each with unique strengths and weaknesses. These include notable features such as tempered glass panels, ample internal space, and various mounting options.
- The Corsair 4000D Airflow. This model stands out for its emphasis on airflow, featuring numerous mesh panels and optimized internal layout. This prioritizes cooling performance, potentially impacting thermal management. The Corsair 4000D Airflow offers excellent airflow, which can lead to improved temperatures for high-performance components. However, its design may sacrifice some interior space compared to other cases.
- The NZXT H510 Flow. This case combines a clean aesthetic with solid build quality. Its notable feature is its excellent cable management solutions, which streamline the build process and enhance the overall look of the PC. This case provides a balance between aesthetics, build quality, and functional design. However, the available space may be slightly less than other options, potentially impacting the flexibility of high-end component installations.
- The Fractal Design Define R6. Known for its modular design and robust construction, the Define R6 offers significant flexibility in configuring the interior layout. Its exceptional airflow and build quality make it a top choice for users prioritizing both performance and aesthetics. The Define R6’s comprehensive features and modularity can be advantageous for diverse component setups, although this could also contribute to a higher price point compared to some competitors.
Feature and Price Comparison
A direct comparison of key features and prices across these cases provides a clear picture of their relative value.
| Feature | Thermaltake Tower 900 | Corsair 4000D Airflow | NZXT H510 Flow | Fractal Design Define R6 |
|---|---|---|---|---|
| Size | Mid-Tower | Mid-Tower | Mid-Tower | Mid-Tower |
| Tempered Glass | Yes | Yes | Yes | Yes |
| Airflow | Good | Excellent | Good | Excellent |
| Compatibility | Good | Good | Good | Good |
| Price (USD) | ~ $100 | ~ $120 | ~ $110 | ~ $130 |
This table summarizes the key features and estimated prices for these competitive cases. The price range reflects the market value of the features offered by each model.
Pros and Cons
Each case has its own advantages and disadvantages, requiring a personalized evaluation.
- Thermaltake Tower 900 Pros: Good balance of features and price, ample space for components, good build quality.
- Thermaltake Tower 900 Cons: Airflow could be improved for high-end configurations.
- Corsair 4000D Airflow Pros: Excellent airflow, great for high-performance systems.
- Corsair 4000D Airflow Cons: Potential for less internal space than some competitors.
- NZXT H510 Flow Pros: Excellent cable management, sleek aesthetics, good value for money.
- NZXT H510 Flow Cons: May not have the largest internal space available.
- Fractal Design Define R6 Pros: Modular design, great build quality, superior airflow, excellent flexibility.
- Fractal Design Define R6 Cons: Potentially higher price point compared to other options.
Careful consideration of your specific needs and budget will help determine the optimal choice.
Installation and Setup Guide
Installing components within the Thermaltake Tower 900 is straightforward, with clear markings and well-designed interior space. This guide provides a step-by-step process to ensure a smooth and efficient build. Proper installation is crucial for optimal system performance and longevity.The Thermaltake Tower 900 is designed with user-friendliness in mind. The spacious interior and intuitive layout facilitate the installation of various components, including the motherboard, CPU, GPU, and storage devices.
This guide details the process for a complete build, from initial setup to adding fans and radiators.
Motherboard Installation
The motherboard installation process is critical for a stable system. Ensure the motherboard tray is correctly aligned with the case’s mounting points. Carefully lower the motherboard into the tray, ensuring all mounting screws are properly tightened. Refer to your motherboard’s manual for specific installation instructions.
CPU Installation
Carefully remove the CPU from its packaging. Align the CPU with the socket on the motherboard. Apply a thin layer of thermal paste to the CPU’s surface, ensuring even coverage. Gently lower the CPU into the socket, and secure it with the retaining lever.
GPU Installation
The GPU installation process depends on the GPU’s size and the case’s layout. Ensure the GPU’s mounting bracket is aligned correctly with the PCI-e slots. Secure the GPU using the provided screws, taking care not to overtighten.
Storage Device Installation
The Thermaltake Tower 900 provides multiple mounting options for hard drives and SSDs. Use the provided mounting brackets and screws to secure the storage devices in the designated bays.
Power Supply Unit (PSU) Installation
The PSU should be installed in the designated space at the rear of the case. Connect the PSU’s power cables to the motherboard and other components, following the wiring diagram.
Cooling Fan and Radiator Installation
The Thermaltake Tower 900 provides ample space for mounting fans and radiators. Refer to the manufacturer’s instructions for the specific fan or radiator you are installing. Ensure proper airflow by placing fans in strategic locations within the case.
Table of Contents
- Introduction: Overview of the installation process and importance of proper installation.
- Motherboard Installation: Detailed steps for securing the motherboard in the case.
- CPU Installation: Correct placement and thermal paste application for the CPU.
- GPU Installation: Procedures for mounting and securing the GPU.
- Storage Device Installation: Mounting hard drives and SSDs in the designated bays.
- Power Supply Unit (PSU) Installation: Placement and connection of the PSU within the case.
- Cooling Fan and Radiator Installation: Mounting fans and radiators in optimal locations for airflow.
Maintenance and Troubleshooting
Maintaining the Thermaltake Tower 900 is crucial for optimal performance and longevity. Proper cleaning and troubleshooting common issues can prevent costly repairs and ensure your system runs smoothly. This section provides detailed steps and solutions for keeping your case in tip-top shape.
Cleaning Procedures
Regular cleaning prevents dust buildup, which can negatively impact airflow and component temperatures. Follow these steps for a thorough cleaning.
- Power Down and Disconnect: Before beginning any cleaning, ensure the PC is powered off and all cables are disconnected from the case.
- Dust Removal: Use compressed air to carefully remove dust from fans, vents, and hard-to-reach areas. Avoid using harsh chemicals or abrasive materials, as these could damage components or the case itself. Focus on areas where airflow is critical, including fan blades and radiator fins. A gentle, focused stream of air is best.
- Component Cleaning: Clean components like the motherboard and graphics card with a soft, slightly damp cloth. Ensure the cloth is lint-free and does not contain abrasive materials. Wipe down all surfaces, ensuring no liquid touches any electronic components.
- Reassembly: Once all components are cleaned, reassemble the case, connecting cables and ensuring proper seating. Reconnect all peripherals and power supply cables.
Troubleshooting Common Issues
Several issues can arise with any computer case. This section Artikels common problems and their solutions.
- Insufficient Airflow: Insufficient airflow can lead to overheating. Ensure all fans are properly installed and working correctly. Check fan connections and verify the speed. Verify all fans are properly installed. Clean dust build-up from the case interior and from the fans themselves.
If the problem persists, consider upgrading to higher-performance fans or adding additional cooling solutions.
- Case Noise: Excessive noise from the case may indicate loose components or faulty fans. Tighten all screws and ensure components are securely installed. Verify fan connections for any loose wires or issues with the fan itself. Inspect fans for any damage or blockage. If the problem persists, consider replacing any faulty fans.
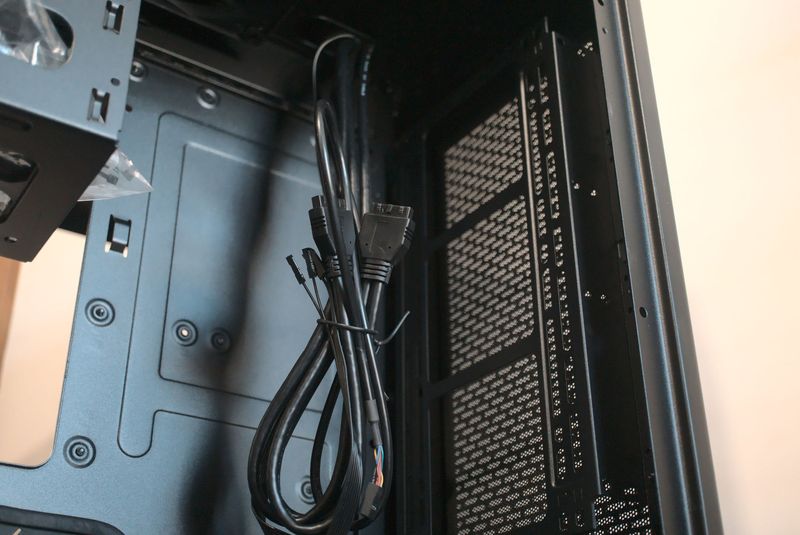
- Cable Management Issues: Tangled cables can impede airflow and create aesthetic concerns. Use cable ties to neatly organize cables, ensuring they don’t obstruct airflow. Properly manage cables from the power supply to other components to reduce cable clutter and prevent overheating.
Troubleshooting Guide
This table summarizes common issues and their corresponding solutions.
| Issue | Solution |
|---|---|
| Insufficient airflow | Clean the case interior, verify fan installation, consider additional cooling solutions. |
| Excessive noise | Tighten loose screws, check fan connections, inspect fans for damage or blockages. |
| Cable management issues | Use cable ties to organize cables and ensure they don’t impede airflow. |
| Case won’t power on | Verify power supply connections, check power switch, ensure all cables are properly connected. |
Conclusion
In conclusion, the Thermaltake Tower 900 presents a compelling mid-tower option with a balance of features. Its design caters to various builds, while its performance and build quality offer solid value. Ultimately, the case’s suitability depends on individual priorities and preferences. Whether you’re a seasoned builder or a novice, this analysis equips you with the knowledge to make an informed decision.
Expert Answers
What are the typical dimensions of the Thermaltake Tower 900?
The Thermaltake Tower 900 measures approximately 450mm (length) x 210mm (width) x 460mm (height).
Does the case support E-ATX motherboards?
While the case doesn’t explicitly mention E-ATX support, it’s crucial to check the specifications for exact compatibility.
What is the maximum GPU length supported by the Thermaltake Tower 900?
The case generally supports GPUs up to 360mm in length, but specific configurations might vary.
How many 3.5″ and 2.5″ drive bays does the case offer?
The case typically provides several drive bays, but the exact number depends on the specific version.
Are there any pre-installed fans, and if so, how many?
Some models include pre-installed fans. Refer to the specific product listing for confirmation.


