
Building a custom PC is more than just assembling parts; it’s crafting a powerful machine tailored to your exact needs. Imagine a gaming rig, a workstation, or a creative powerhouse, meticulously designed to push the boundaries of performance. This guide will walk you through the entire process, from selecting components to optimizing performance, ensuring your custom PC becomes a true extension of your digital aspirations.
From the initial spark of an idea to the final, satisfying click of the power button, this guide covers everything you need to know. We’ll delve into the nuances of component selection, the intricacies of the building process, and the art of troubleshooting and maintenance. Prepare to dive into the world of high-performance computing.
Introduction to Custom Built PCs
A custom built PC is a personal computer assembled by an individual or enthusiast, choosing specific components to meet their unique needs and desired performance. This contrasts with pre-built PCs, where the components are pre-selected and assembled by a manufacturer. The process involves selecting and installing each part, offering a degree of control over the final product and potential for performance optimization.Building a custom PC allows for significant control over the configuration and, consequently, the performance characteristics.
This customization extends beyond simple aesthetics to the core functionality, allowing users to tailor the system to their specific tasks and applications. From gaming to content creation, the potential for fine-tuning the system for optimal results is a key advantage.
Key Components of a Custom Built PC
A custom PC’s core components determine its functionality and performance. These include the motherboard, CPU, GPU, RAM, storage (SSD/HDD), power supply, and case. Each component plays a critical role in the overall system performance, from the CPU’s processing power to the GPU’s graphical capabilities. Careful consideration of compatibility between components is essential for a successful build.
Advantages of Building a Custom PC
Custom PCs offer several benefits over pre-built systems. Firstly, cost savings are a significant motivator. Often, assembling components individually can result in a lower overall cost compared to purchasing a pre-built system with comparable specifications. Secondly, unparalleled customization empowers users to choose components best suited for their needs and budget. Finally, the potential for enhanced performance is a major attraction.
Careful component selection can lead to a system that significantly surpasses the performance of a pre-built system with similar pricing.
Custom vs. Pre-Built PC Comparison
| Feature | Custom Built PC | Pre-Built PC |
|---|---|---|
| Price | Potentially lower, depending on component choices. | Often higher for similar performance, due to markups and included components. |
| Performance | Potentially higher, achievable with optimized component choices. | Performance varies depending on the specific model; can be comparable to custom-built systems with appropriate configurations. |
| Customization | High degree of customization, allowing users to choose exact components and configurations. | Limited customization options; often comes with pre-selected components. |
| Support and Warranty | User responsibility for troubleshooting and repairs. | Typically includes manufacturer support and warranty for certain components. |
A Brief History of Custom PC Building
The early days of personal computers saw the emergence of enthusiasts who sought to improve and expand the capabilities of their machines. The ability to upgrade and modify components allowed for significant performance increases and flexibility in design. The development of advanced cooling solutions, optimized power supplies, and the ever-increasing capabilities of CPUs and GPUs were key milestones in this evolution.
From early DIY modifications to the sophisticated component choices available today, custom PC building has become a significant part of the PC market, with enthusiasts pushing the boundaries of what’s possible. This evolution continues as new technologies emerge.
Components and Selection
Building a custom PC involves carefully selecting each component to achieve optimal performance and desired features. This meticulous process requires understanding the role each part plays in the overall system’s functionality and the potential impact of different choices. From the powerful brain of the CPU to the crucial role of the PSU, each component contributes to the final result.
Understanding the specifications and trade-offs associated with each component is key to building a machine that meets individual needs.The components of a custom PC are highly interconnected. A high-end CPU, for example, may require a powerful motherboard to handle its demands, and both need a PSU capable of supplying the necessary power. Similarly, the graphics card’s capabilities will be limited if the RAM or storage cannot keep up.
This interdependency necessitates careful consideration of each component’s specifications and compatibility when building a system.
CPU Models
Central Processing Units (CPUs) are the brains of the PC, performing calculations and executing instructions. Different CPU models vary significantly in performance and price. Factors like clock speed, number of cores, and cache size influence the overall processing power.
| CPU Model | Clock Speed (GHz) | Number of Cores | Cache (MB) | Price Range ($) |
|---|---|---|---|---|
| Intel Core i5-13600K | 4.9 GHz | 14 | 24 MB | $250-$300 |
| AMD Ryzen 7 7700X | 4.5 GHz | 8 | 16 MB | $300-$350 |
| Intel Core i9-13900K | 5.8 GHz | 24 | 36 MB | $500-$600 |
Motherboard Selection
The motherboard acts as the central hub connecting all components. Choosing the right motherboard is crucial for compatibility and performance. The form factor (e.g., ATX, Micro-ATX) dictates the size and layout of the PC case and the potential for expansion. Furthermore, compatibility with the chosen CPU and other components is paramount.
RAM and Storage
Random Access Memory (RAM) and storage devices play vital roles in system performance. RAM provides temporary storage for active programs and data, influencing application responsiveness and multitasking capabilities. Fast RAM (higher clock speeds) is essential for smoother operation. Storage devices, including solid-state drives (SSDs) and hard disk drives (HDDs), store the operating system, programs, and user data. SSDs offer significantly faster read/write speeds than HDDs, making them ideal for boot times and application loading.
Graphics Card Selection
The graphics card (GPU) handles image processing for graphics-intensive tasks like gaming and video editing. Choosing the right GPU depends on the desired resolution, refresh rate, and gaming capabilities. Higher resolution and refresh rates require more powerful GPUs. Modern GPUs often have multiple performance metrics (e.g., CUDA cores) that influence the quality and speed of graphics rendering.
Power Supply Unit (PSU)
The power supply unit (PSU) provides power to all components. Selecting a PSU with sufficient wattage is critical to avoid system instability and potential damage. Overestimating the wattage is better than underestimating it. A PSU that’s too small can lead to components not receiving enough power, while a PSU that’s too large is unnecessary and wasteful.
Component Selection Guide
This table summarizes key component features and their significance when building a custom PC.
| Component | Key Feature | Importance |
|---|---|---|
| CPU | Clock Speed, Cores, Cache | Overall processing power |
| Motherboard | Form Factor, Compatibility | Central hub for all components |
| RAM | Clock Speed, Capacity | Application responsiveness and multitasking |
| Storage | Type (SSD/HDD), Capacity | Data storage speed and capacity |
| GPU | Resolution, Refresh Rate, Performance | Graphics processing power |
| PSU | Wattage, Efficiency | Reliable power delivery |
Building Process and Setup
Assembling a custom PC is a rewarding experience, allowing you to tailor your system to your specific needs and preferences. Careful attention to detail and a methodical approach are key to a successful build. This section will guide you through the step-by-step process, detailing necessary tools, component installation, and crucial setup procedures.The process involves several key steps, from installing the foundational components to ensuring the system’s proper functionality after assembly.
Thorough preparation and meticulous execution are paramount for a smooth and successful build.
CPU and Motherboard Installation
Installing the CPU and motherboard requires precision and care to avoid damage. First, ensure the motherboard’s static-protective measures are in place. Next, carefully align the CPU with the socket, ensuring proper orientation. Gently press down until it clicks into place. Apply thermal paste to the CPU, ensuring even coverage.
Secure the heatsink to the CPU using the appropriate mounting screws and clips. Connect the CPU fan power cable to the motherboard.
RAM Installation
RAM installation is straightforward. Locate the RAM slots on the motherboard. Align the RAM modules with the slots, ensuring proper orientation. Gently press down on the modules until they click into place. Verify the RAM is securely installed.
Graphics Card Installation
The graphics card (GPU) is a crucial component for visual output. Carefully align the GPU with the PCIe slot on the motherboard. Securely fasten the card with the included mounting screws. Connect the necessary power cables to the GPU from the power supply unit.
Storage Device and Power Supply Installation
Install storage devices like SSDs and HDDs in their respective bays. Connect the data cables to the motherboard and storage devices. Position the power supply unit (PSU) in the case. Connect the power cables to the motherboard, graphics card, and storage devices. Ensure proper cable management for airflow and stability.
Connecting Cables and Checking Functionality
Connecting all cables correctly is essential for proper system operation. Carefully route cables to avoid kinks and ensure sufficient airflow. Check all connections for proper fit and security. Power on the system and check for any errors or issues.
Checklist Before Powering On
- Verify all components are correctly installed and secured.
- Ensure all cables are properly connected and secure.
- Check for any loose or dangling wires.
- Confirm all mounting screws are tightened.
- Inspect for any signs of damage to components.
- Confirm the PSU is correctly installed and properly grounded.
- Double-check all connections to the motherboard.
Correct cable management is essential for airflow and system stability.
Operating System and Driver Installation
Installing the operating system (OS) and drivers is crucial for system functionality. Follow the OS installation instructions. Install the necessary drivers for all components after the OS is installed. Test all functionalities to ensure compatibility and proper operation.
Troubleshooting and Maintenance
Building a custom PC is a rewarding experience, but understanding how to troubleshoot issues and maintain your system is equally crucial. Proper maintenance not only ensures longevity but also prevents frustrating problems down the line. This section will guide you through common issues, troubleshooting steps, and preventive maintenance strategies.
Common Building Process Issues
Identifying problems during the building process can save you time and frustration. Common issues include mismatched component compatibility, incorrect cable connections, and static electricity damage. Carefully following the component manuals and ensuring proper grounding techniques are essential.
Troubleshooting Hardware Problems
Troubleshooting hardware issues requires a systematic approach. Begin by checking the power supply, ensuring proper connections and adequate wattage. Next, verify that all components are seated correctly. If the issue persists, consider testing the components individually on a different system to isolate the faulty part.
PC Maintenance Methods
Regular maintenance is vital for optimal PC performance and lifespan. Regular cleaning and monitoring of temperatures are key elements in preventing premature component failure.
Cleaning PC Components
Cleaning the inside of your PC case is essential to prevent dust buildup, which can lead to overheating and performance degradation. Use compressed air to carefully remove dust from components, paying special attention to fans and heat sinks. Avoid using water or other liquids. Disassemble components as necessary to clean them thoroughly.
Preventive Maintenance Measures
Implementing preventive maintenance extends the lifespan of your components and reduces the risk of unexpected failures. Regularly check temperatures, monitor fan speeds, and ensure adequate airflow within the case. Using cooling solutions, like liquid cooling, can enhance heat dissipation. Monitoring your PC’s health through system monitoring software will provide early warning signs of potential problems.
Diagnosing System Errors
Diagnosing system errors, such as Blue Screen of Death (BSOD) or boot failures, requires methodical investigation. BSODs often indicate driver conflicts, hardware issues, or corrupted operating system files. Boot failures can be caused by a variety of issues, including hard drive problems, corrupted boot sectors, or incompatibility issues. Detailed error messages can provide clues for troubleshooting.
PC Instability and Overheating
PC instability and overheating can stem from several factors, including inadequate cooling solutions, faulty components, or outdated drivers. Overheating can lead to instability, crashes, and even permanent damage to components. Ensuring sufficient airflow, using appropriate cooling solutions, and keeping your PC clean can help prevent these issues. Monitoring component temperatures through software utilities can provide early indications of potential problems.
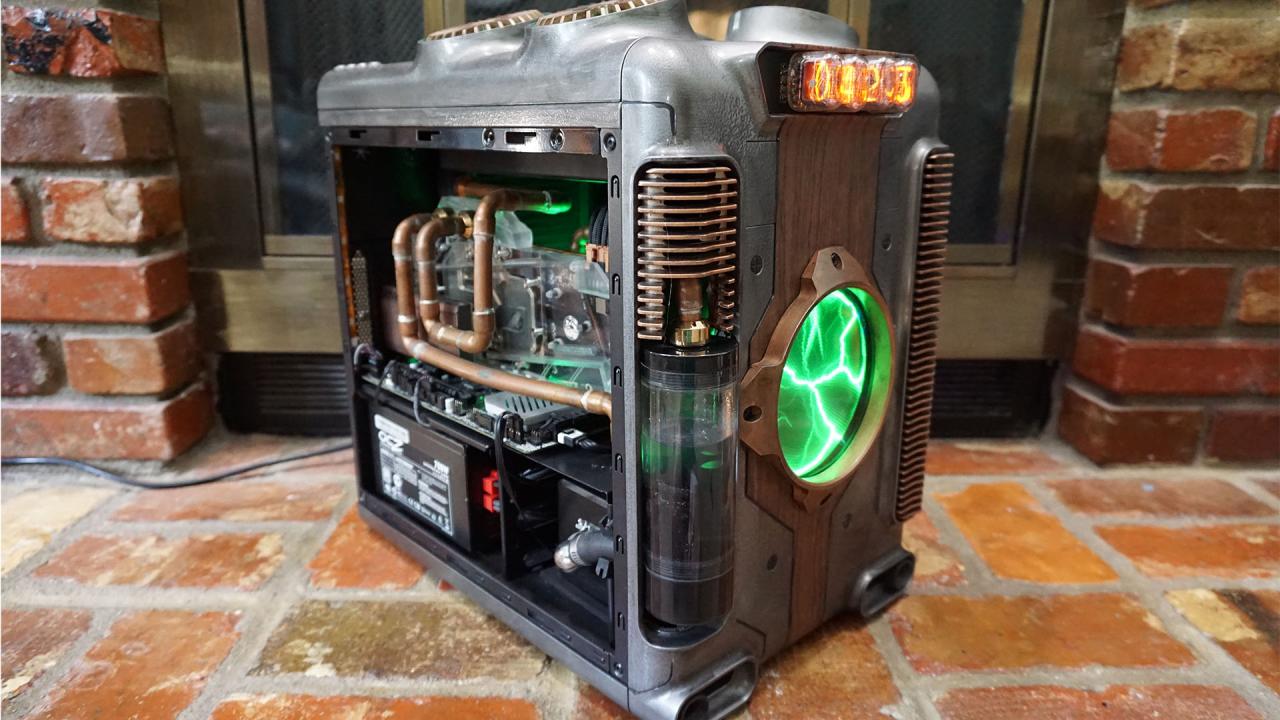
Customization and Aesthetics
Turning a barebones PC into a personalized masterpiece involves more than just the technical specifications. Aesthetics play a crucial role in the overall enjoyment of owning a custom-built PC. Choosing the right components and meticulously planning the build’s appearance can significantly enhance the user experience.Personalizing your PC’s appearance extends beyond the obvious. From the exterior case to the internal cooling solutions and lighting, every aspect offers opportunities for unique expression.
The case, in particular, serves as the canvas for showcasing your creativity and taste. The components and their arrangement inside the case also contribute to the overall aesthetic.
PC Case Selection
Selecting a PC case is a significant decision, impacting both the build’s functionality and its visual appeal. Different cases cater to various aesthetic preferences. Some are minimalist and sleek, while others are more aggressive and visually striking. The size and shape of the case also influence the types of components that can be accommodated.
Choosing a case that complements your desired aesthetic is crucial. A minimalist case will not suit a build with extensive RGB lighting, and vice-versa.
- Mid-Tower Cases: These are a popular choice for their balance of size, features, and aesthetics. They typically offer ample space for components while maintaining a relatively compact profile. Examples include the Fractal Design Define R6 and Corsair 4000D Airflow.
- Full-Tower Cases: Ideal for users who want maximum component space and customization options. These offer extensive interior room, often with multiple drive bays and cable management features. They are best suited for high-end builds with extensive cooling solutions.
- Mini-Tower Cases: Perfect for compact setups, often favored for their sleek design and smaller footprint. They are ideal for those seeking a space-saving solution with a modern aesthetic, like the NZXT H510i.
Internal Customization
The interior of the PC case provides further opportunities for personalization. Careful cable management is vital for both aesthetics and optimal airflow. Utilizing cable ties, Velcro straps, or even specialized cable management solutions can significantly improve the visual appeal of the interior.
- Cable Management: Organized cables not only enhance the aesthetic but also improve airflow and prevent potential short circuits. Employing cable ties, zip ties, or dedicated cable management solutions is recommended for professional results. Using cable combs and zip ties for grouping cables will help.
- Component Arrangement: The placement of components within the case, like the motherboard, GPU, and storage drives, can be adjusted to create a visually appealing layout. Experiment with different arrangements to find one that suits your preferences.
Cooling Solutions
Cooling solutions are not only essential for performance but also contribute to the overall aesthetic. Different types of fans and radiators offer various visual characteristics. For example, transparent cases allow the internal components to be viewed, while fans with RGB lighting can add a dynamic element.
- Air Cooling: A straightforward cooling solution that relies on fans to draw air through the PC case and expel heat. They are typically more affordable and simpler to implement.
- Liquid Cooling: A more sophisticated cooling method, often featuring visually appealing components like custom loops and radiators. These can be customized with specific colors and patterns to complement the overall build.
Lighting Personalization
RGB lighting is a popular choice for personalizing the PC. Many components, including fans, cases, and even motherboards, offer customizable lighting options. Custom software allows for a wide range of effects, including static colors, dynamic patterns, and even synchronized lighting with other devices.
- RGB Lighting Control: Software applications allow for intricate control over the lighting of components. You can set up sequences, colors, and patterns for an eye-catching visual experience.
- Custom Lighting Configurations: Users can create their own lighting patterns and sequences, offering virtually limitless customization possibilities. For example, creating a unique pattern that changes in response to specific game actions or events.
Performance and Optimization
Optimizing a custom-built PC for peak performance involves a multifaceted approach. Beyond selecting high-performance components, diligent monitoring and careful configuration are crucial. This section details various software tools and techniques to achieve optimal system performance, ensuring smooth operation and exceptional gaming experiences.
Software Tools for Performance Optimization
Several software tools aid in identifying and resolving performance bottlenecks. These tools provide insights into system resource utilization, enabling targeted adjustments for improved efficiency. Effective utilization of these tools streamlines the optimization process.
- Performance monitoring utilities such as HWMonitor, Core Temp, and MSI Afterburner provide real-time data on CPU temperature, core clock speeds, and GPU utilization. This data allows proactive identification of potential overheating issues, helping prevent system instability and ensuring sustained high performance.
- System resource monitoring tools like Resource Monitor (Windows) and Activity Monitor (macOS) offer detailed insights into CPU, memory, disk, and network activity. These tools allow users to pinpoint applications or processes consuming excessive resources, facilitating targeted optimization efforts.
- Specialized game optimization software, like Razer Cortex or MSI Afterburner, provides game-specific performance enhancements. These tools fine-tune graphics settings and allocate resources effectively for enhanced game stability and frame rates.
Monitoring System Performance
Regularly monitoring system performance is essential for identifying potential bottlenecks and maintaining optimal operation. Tools and techniques facilitate the process, enabling proactive intervention to prevent performance degradation.
- Real-time monitoring of CPU usage, memory consumption, and disk activity helps pinpoint performance bottlenecks. For example, consistently high CPU usage might indicate an application demanding excessive processing power.
- Utilizing system resource monitoring tools provides detailed information on resource allocation and utilization. This data assists in understanding how system resources are being utilized, leading to proactive adjustments and preventative measures.
- Performance benchmarks can measure system capabilities and identify potential weaknesses. Benchmarking tools, like 3DMark, provide objective data on system performance under standardized conditions.
Improving Game Performance and Stability
Optimizing game performance requires a tailored approach, taking into account individual game requirements and system capabilities. This includes adjusting settings for enhanced stability and smooth gameplay.
- Reducing visual effects like high-resolution textures, advanced lighting, and complex shadows can significantly improve frame rates. Lowering graphical settings often leads to a more stable and fluid gaming experience.
- Optimizing in-game settings like resolution, texture quality, and anti-aliasing can significantly impact performance. Lowering these settings can improve frame rates and stability.
- Ensuring sufficient system resources, such as memory and storage space, can minimize game crashes and improve stability. Adequate RAM and a fast hard drive contribute to smooth gameplay.
Examples of Monitoring Tools and Identifying Bottlenecks
Specific tools aid in pinpointing system bottlenecks. Monitoring tools provide insights into resource allocation and performance issues.
| Tool | Primary Function | Bottleneck Identification |
|---|---|---|
| Resource Monitor (Windows) | Displays real-time system resource usage | High CPU usage, excessive memory consumption, or slow disk activity pinpoint potential bottlenecks. |
| HWMonitor | Monitors hardware temperatures and sensor readings | High temperatures can indicate overheating issues, which can lead to performance degradation or system instability. |
| MSI Afterburner | Provides GPU monitoring and overclocking | High GPU utilization or low frame rates may indicate a bottleneck in the graphics card. |
Regular System Maintenance for Optimal Performance
Regular system maintenance is crucial for sustained high performance. This includes tasks like cleaning, updating, and optimizing system settings.
- Regular cleaning of the PC case removes dust and debris, preventing overheating and potential performance degradation. Dust buildup hinders airflow, increasing temperatures and leading to performance issues.
- Keeping drivers up to date ensures compatibility and stability. Outdated drivers can lead to performance problems, including crashes and system instability.
- Regular system scans for malware and viruses are essential for maintaining a secure and stable system. Malicious software can consume system resources and lead to performance problems.
Monitoring CPU Usage, Memory Consumption, and Hard Drive Activity
Monitoring these key components helps pinpoint performance issues. Detailed insights enable targeted optimization efforts to achieve optimal system operation.
- CPU usage can be monitored using tools like Task Manager to identify tasks consuming significant processing power. High CPU usage can indicate inefficient programming or heavy workloads.
- Memory consumption can be monitored using tools like Resource Monitor to identify processes consuming large amounts of RAM. Insufficient RAM can lead to system instability and slowdowns.
- Hard drive activity can be monitored to identify slowdowns or bottlenecks. Slow hard drive performance impacts system responsiveness and overall operation.
Optimizing PC Settings for Specific Tasks
Optimizing PC settings for specific tasks can significantly improve performance. This involves adjusting settings to allocate resources effectively.
- Adjusting power settings to prioritize performance can enhance responsiveness. Adjusting power options in the operating system can improve overall system responsiveness.
- Customizing settings for specific applications like games can improve frame rates and stability. Adjusting game settings can improve performance and stability.
- Optimizing virtual memory settings can improve system performance, particularly for memory-intensive tasks. Properly configuring virtual memory can address memory limitations and improve performance.
Conclusive Thoughts
In conclusion, building a custom PC is a rewarding experience. It’s a journey that combines technical understanding with a creative spirit, allowing you to tailor a system that perfectly complements your needs and aspirations. From understanding the components and building process to optimizing performance and addressing potential issues, this comprehensive guide equips you with the knowledge to conquer the digital world.
Questions and Answers
What are the most common reasons for PC instability?
Overheating, insufficient power supply, incompatible components, and driver conflicts are common causes of PC instability. Regular maintenance and careful component selection can mitigate these issues.
What software tools are useful for monitoring PC performance?
Task Manager, CPU-Z, HWMonitor, and CrystalDiskInfo are popular tools for monitoring CPU usage, memory consumption, hard drive activity, and other key system resources. These tools help identify performance bottlenecks and ensure your system runs smoothly.
How can I prevent my custom PC from overheating?
Good airflow within the PC case, using high-quality cooling solutions like fans and liquid coolers, and regular cleaning of components are crucial for preventing overheating. Also, consider the location of the PC and how it is positioned to ensure proper ventilation.
What are some tips for choosing a graphics card for gaming?
Consider the desired resolution, refresh rate, and gaming titles you want to play. Higher resolutions and refresh rates demand more powerful cards. Check benchmarks and reviews to see how different cards perform in your desired games.
What are some common mistakes to avoid during the PC building process?
Static electricity can damage components, so ensure you work on a grounded surface and handle components carefully. Double-check connections and ensure all components are properly seated before powering on. Carefully follow the installation instructions for each part.


